本文实例为大家分享了小程序录音上传的具体代码,供大家参考,具体内容如下
首先我们可以先看一下微信小程序的API
这里有关于小程序录音的一些基本配置

index.wxml:
<view class='progress_box' bindtap='openRecording' style="display:{{openRecordingdis}}">
    <view class="progress_bgs">
     <view class="progress_bg">
      <image class="progress_img" src='../../../images/SubjectInformation/luyin.png'></image>
     </view>
   </view>
</view>
index.wxss:
.topicRecording {
 float: left;
 width: 40%;
 height: 100%;
 position: relative;
}


.progress_box {
 width: 130rpx;
 height: 130rpx;
 margin-left: -65rpx;
 position: absolute;
 bottom: 0;
 left: 50%;
 display: flex;
 align-items: center;
 justify-content: center;
 background: #ccc;
 border-radius: 50%;
}

.progress_bgs {
 width: 114rpx;
 height: 114rpx;
 background: #fff;
 border-radius: 50%;
 margin: 9rpx;
}


.progress_bg {
 width: 106rpx;
 height: 106rpx;
 margin: 5rpx;
 position: absolute;
 background: #444;
 border-radius: 50%;
}


.progress_img {
 width: 82rpx;
 height: 82rpx;
 border-radius: 50%;
 margin: 12rpx;
}
index.js:
Page({
 data: {
  openRecordingdis: "block",//录音图片的不同
  shutRecordingdis: "none",//录音图片的不同
  recordingTimeqwe:0,//录音计时
  setInter:""//录音名称
 },

  //录音计时器
 recordingTimer:function(){
  var that = this;
  //将计时器赋值给setInter
  that.data.setInter = setInterval(
   function () {
    var time = that.data.recordingTimeqwe + 1;
    that.setData({
     recordingTimeqwe: time
    })
   }
   , 1000);
 },


 //开始录音
 openRecording: function() {
  var that = this;
  wx.getSystemInfo({
   success: function(res) {
    that.setData({
     shutRecordingdis: "block",
     openRecordingdis: "none"
    })
   }
  })
  const options = {
   duration: 60000, //指定录音的时长,单位 ms,最大为10分钟(600000),默认为1分钟(60000)
   sampleRate: 16000, //采样率
   numberOfChannels: 1, //录音通道数
   encodeBitRate: 96000, //编码码率
   format: 'mp3', //音频格式,有效值 aac/mp3
   frameSize: 50, //指定帧大小,单位 KB
  }
  //开始录音计时
  that.recordingTimer();
  //开始录音
  recorderManager.start(options);
  recorderManager.onStart(() => {
   console.log('。。。开始录音。。。')
  });
  //错误回调
  recorderManager.onError((res) => {
   console.log(res);
  })
 },

 //结束录音
 shutRecording: function() {
  var that = this;
  wx.getSystemInfo({
   success: function(res) {
    that.setData({
     shutRecordingdis: "none",
     openRecordingdis: "block"
    })
   }
  })
  recorderManager.stop();
  recorderManager.onStop((res) => {
   console.log('。。停止录音。。', res.tempFilePath)
   const {tempFilePath} = res;
   //结束录音计时
   clearInterval(that.data.setInter);
   //上传录音
   wx.uploadFile({
    url: appURL + '/wx_SubjectInformation/wx_SubjectRecordKeeping.do',//这是你自己后台的连接
    filePath: tempFilePath,
    name:"file",//后台要绑定的名称
    header: {
     "Content-Type": "multipart/form-data"
    },
    //参数绑定
    formData:{
     recordingtime: that.data.recordingTimeqwe,
     topicid: that.data.topicid,
     userid:1,
     praisepoints:0
    },
    success:function(ress){
     console.log(res);
     wx.showToast({
      title: '保存完成',
      icon:'success',
      duration:2000
     })
    },
    fail: function(ress){
     console.log("。。录音保存失败。。");
    }
   })
  })
 },

 //录音播放
 recordingAndPlaying: function(eve) {
  wx.playBackgroundAudio({
   //播放地址
   dataUrl: '' + eve.currentTarget.dataset.gid + ''
  })
 },

})
上传服务
@RequestMapping(value = "/wx_SubjectRecordKeeping", produces = "application/json")
 @ResponseBody
 public Object wx_SubjectRecordKeeping(HttpServletRequest request,
  @RequestParam("file") MultipartFile files, String recordingtime,
  int topicid,int userid,int praisepoints) {
 // 构建上传目录路径
 // request.getServletContext().getRealPath("/upload");
 String uploadPath = 你自己保存音频的URL;
 // 如果目录不存在就创建
 File uploadDir = new File(uploadPath);
 if (!uploadDir.exists()) {
  uploadDir.mkdir();
 }
 // 获取文件的 名称.扩展名
 String oldName = files.getOriginalFilename();
 String extensionName = "";
 // 获取原来的扩展名
 if ((oldName != null) && (oldName.length() > 0)) {
  int dot = oldName.lastIndexOf('.');
  if ((dot > -1) && (dot < (oldName.length() - 1))) {
  extensionName = oldName.substring(dot);
  }
 }
 // 构建文件名称
 String fileName = System.currentTimeMillis() + "_" + System.nanoTime()
  + extensionName;
 // 获取
 String[] fileType = { ".CD", ".WAVE", ".AIFF", ".AU", ".MPEG", ".MP3",
  ".MPEG-4", ".MIDI", ".WMA", ".RealAudio", ".VQF", ".OggVorbis",
  ".AMR" };
 List<String> fileTyepLists = Arrays.asList(fileType);
 int fileTypeOnCount = 0;
 for (String fileTyepListss : fileTyepLists) {
  if (fileTyepListss.equalsIgnoreCase(extensionName)) {
  // -----如果是音频文件的话
  // 构建文件路径
  String filePath = uploadPath + File.separator + fileName;
  // 保存文件
  try {
   FileUtils.writeByteArrayToFile(new File(filePath),
    files.getBytes());
  } catch (Exception e) {
   e.printStackTrace();
  }
  } else {
  fileTypeOnCount++;
  }
 }
 if (fileTypeOnCount == fileTyepLists.size()) {
  // 不是音频文件
  return false;
 }
 return false;
 }
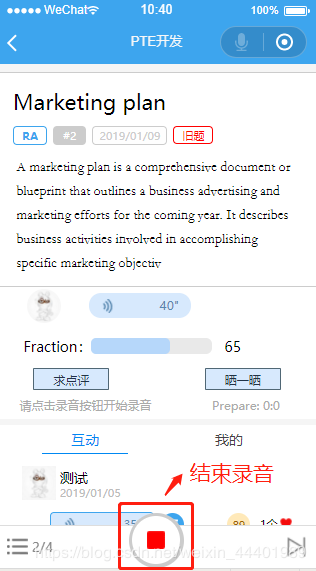
效果图
点击开始录音、录完后点击结束录音

录音成功后的返回

录制的音频文件

以上就是本文的全部内容,希望对大家的学习有所帮助,也希望大家多多支持。
标签:
小程序,录音上传
免责声明:本站文章均来自网站采集或用户投稿,网站不提供任何软件下载或自行开发的软件!
如有用户或公司发现本站内容信息存在侵权行为,请邮件告知! 858582#qq.com
内蒙古资源网 Copyright www.nmgbbs.com
暂无“小程序实现录音上传功能”评论...